

Correct Way to Take Clothing Measurements – A Complete Tailor’s Guide
Taking the correct dress measurement is one of the most important skills every tailor must master. A perfectly fitted dress depends on accurate measurements, and even a small mistake can affect the final result. This tailor’s guide will teach you step-by-step how to measure clothes the right way for both men and women. From measuring the bust, waist, and hips to calculating sleeve length, shoulder width, and dress length — every step is explained in detail. You will also learn about the essential measuring tools like a measuring tape, notepad, and tailor’s chalk, along with professional tips to avoid common measuring mistakes. Whether you are a beginner tailor or an experienced dressmaker, these measurement techniques will help you create clothing that fits perfectly and looks professional. The guide also covers special tips for measuring different fabrics, body types, and custom designs. By following these instructions, you can improve your tailoring skills, satisfy your customers, and grow your tailoring business. Accurate dress measurement is the first step towards creating beautiful clothes, and this guide ensures you get it right every time.
dress measurement guide how to measure clothes accurately tailor measurement techniques body measurement for tailoring bust waist hip measurement chart dress size measurement tips accurate garment fitting guide measurement tape for tailoring professional tailor body measurement dress sewing measurement steps tailoring size guide clothing measurement process step-by-step body measurement for dress how to take measurements for sewing measuring body for perfect fitting clothes women’s dress measurement tips men’s clothing measurement guide body size measurement for stitching sewing and tailoring measurements common measurement mistakes in tailoring correct method of taking dress measurements how to take clothing measurements tailor’s guide for measurements dress measurement tips step-by-step dress measuring guide accurate clothing measurements tailor measuring techniques measurement guide for tailors how to measure for clothes professional dress measurement methods tailoring mistakes to avoid, common measurement errors, garment fitting tips, tailoring accuracy, CBVSD tailoring guide CBVSD tailoring tips, tailoring measurement guide, accurate garment measurement, professional tailor advice, tailoring course CBVSD, best tailoring training in India.
Suroj
In the world of tailoring, the most important skill is not sewing — it is taking accurate measurements. Without the correct measurements, even the most beautiful fabric and expert stitching will fail to produce a perfect fit.
At the Central Board of Vocational Skill Development (CBVSD), we train future tailors to master measurement techniques so they can create garments that look and feel perfect for their customers.
Whether you are a beginner or an experienced tailor, knowing the right way to measure is essential. In this guide, you will learn step-by-step how to take measurements like a professional, avoid common mistakes, and apply pro tips for perfect results.
Why Accurate Measurements Matter
Accurate measurements are the foundation of great tailoring. They ensure:
The clothing fits perfectly and looks professional.
Customers feel comfortable and satisfied, leading to repeat orders.
Less fabric is wasted, saving money and time.
Alterations are reduced, making your work faster and more profitable.
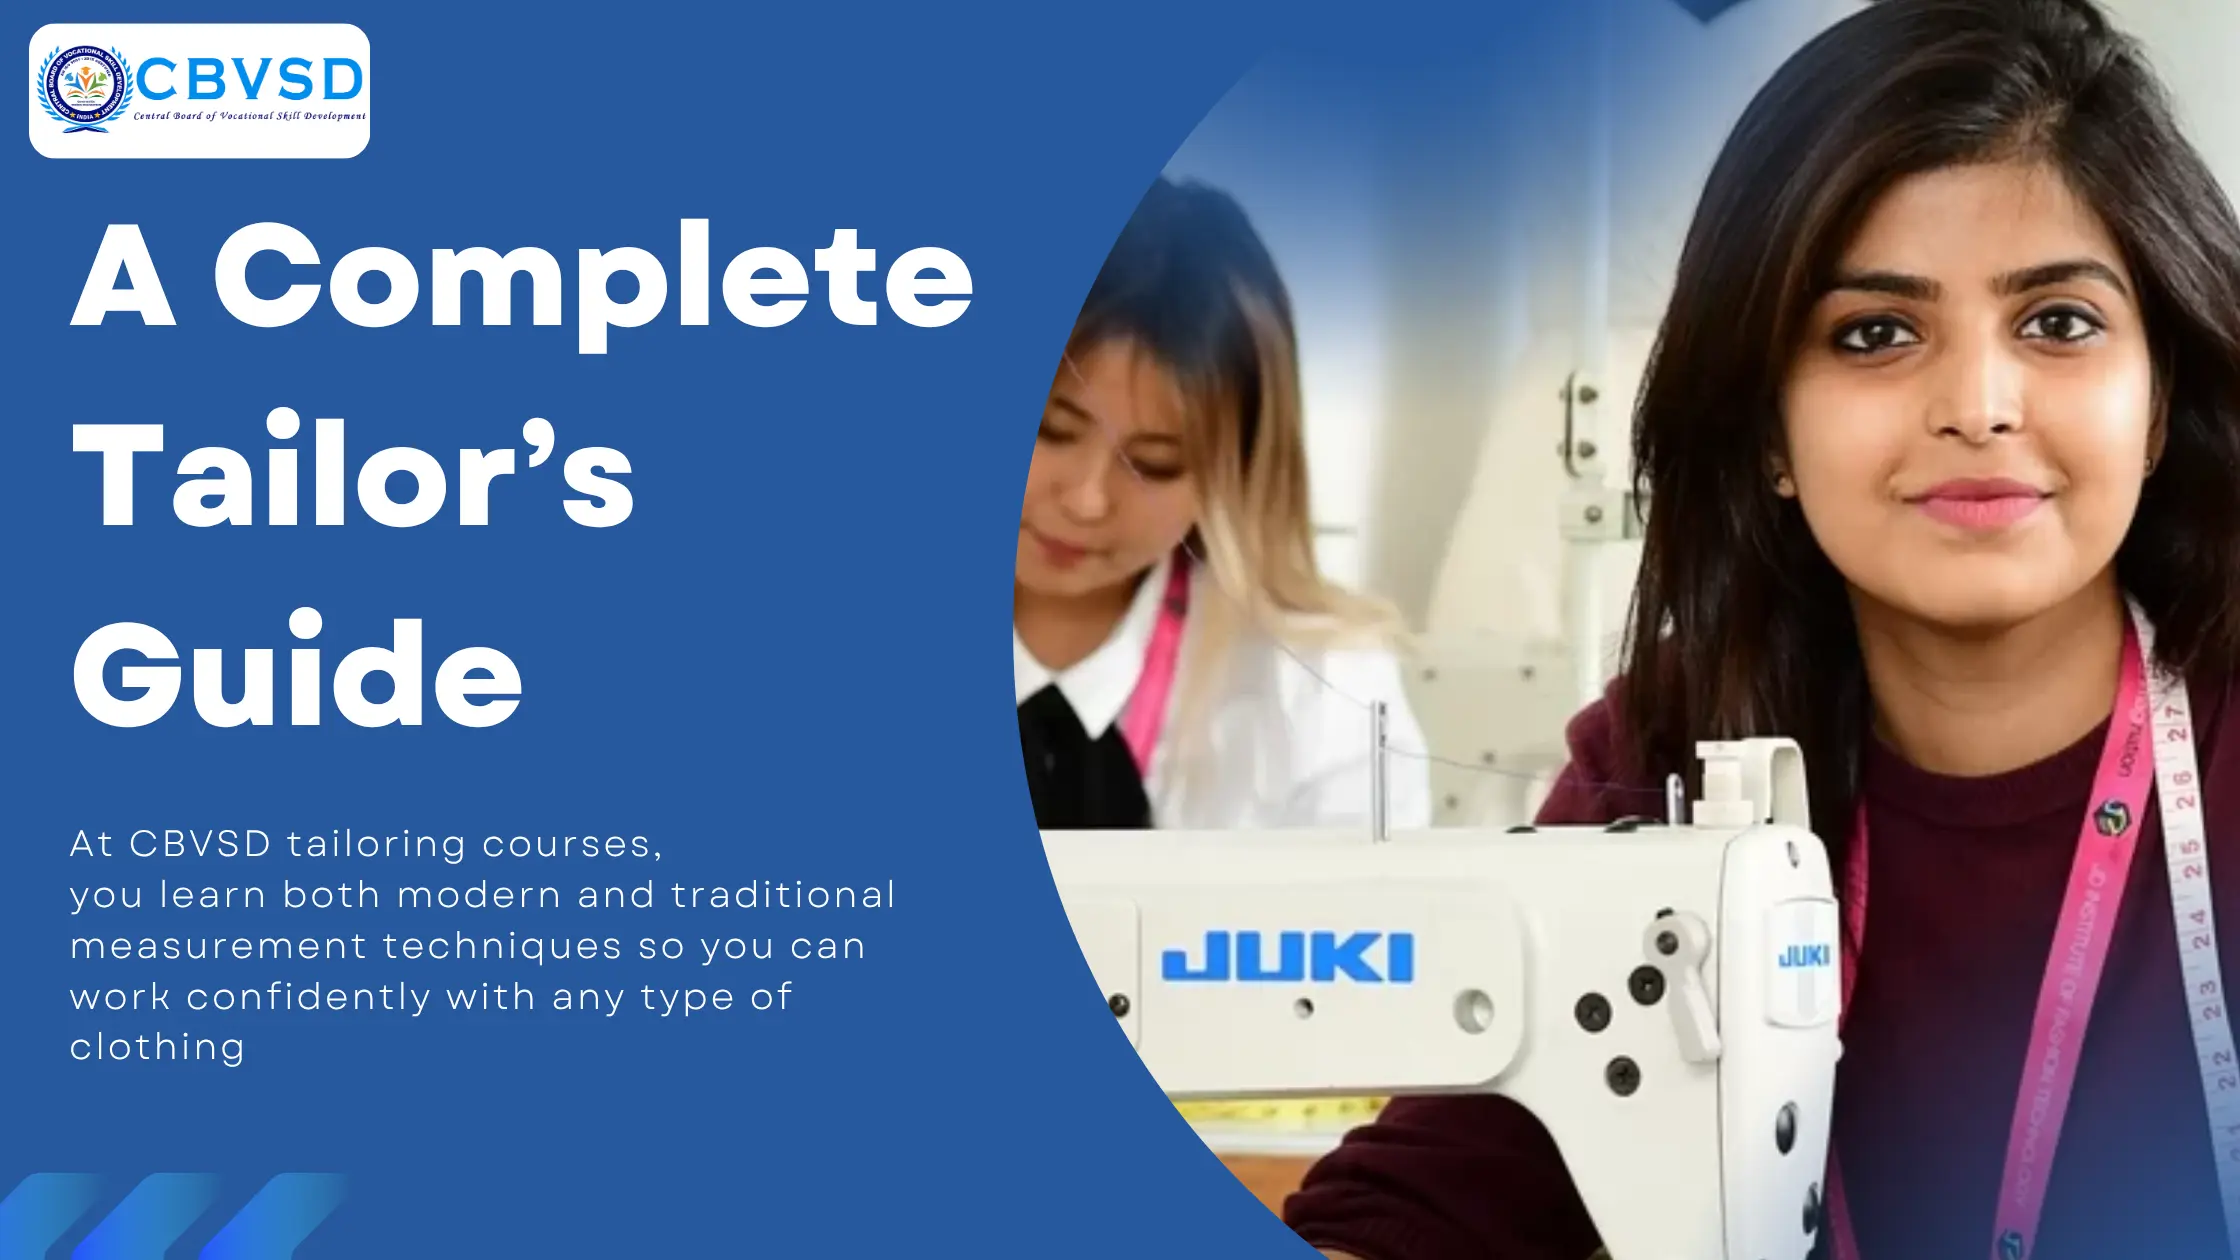
📌 At CBVSD tailoring courses, you learn both modern and traditional measurement techniques so you can work confidently with any type of clothing.
Essential Tools for Taking Measurements
Before you start measuring, you need the right tools:
Measuring Tape – Soft, flexible, and marked in inches & centimeters.
Notebook / Measurement Sheet – To record measurements clearly.
Pencil or Pen – For neat and quick notes.
Elastic or Ribbon – To mark the natural waistline.
Mirror – For checking angles and posture.
Tailor’s Chalk – To mark fabric if needed.
Assistant (Optional) – Helpful for measuring hard-to-reach areas.
💡 Tip: Always use a soft, non-stretchable tape and make sure it is in good condition.
CBVSD-Approved Step-by-Step Clothing Measurement Guide
1. Neck Measurement
Place the tape around the base of the neck where a shirt collar would sit.
Keep it slightly loose for comfort.
📏 Example: 14 inches
2. Shoulder Width
Measure from the edge of one shoulder bone to the other, across the back.
Ensure the tape runs straight.
📏 Example: 16 inches
3. Chest / Bust
Wrap the tape around the fullest part of the chest or bust.
Keep the tape level and snug, not tight.
📏 Example: 38 inches
4. Waist
Find the natural waistline (usually just above the navel).
Tie an elastic or ribbon for easy marking.
Wrap the tape parallel to the floor.
📏 Example: 32 inches
5. Hip
Measure around the widest part of the hips and buttocks.
Keep the tape parallel to the floor.
📏 Example: 40 inches
6. Sleeve Length
- Start at the shoulder tip and measure to the wrist.
Ask the person to slightly bend their elbow.
📏 Example: 23 inches
7. Armhole (Arm Scye)
- Wrap the tape around the shoulder and under the arm in a loop.
- Keep it slightly loose for movement.
📏 Example: 18 inches
8. Back Length
- Measure from the base of the neck to the waistline at the back.
9. Full Garment Length
- Measure from the top of the shoulder to the desired hemline (e.g., knee, ankle).
10. Trouser or Skirt Length
Trousers: Waist to ankle.
Skirts: Waist to desired skirt length.
11. Inseam (for Pants)
- Measure from the crotch to the ankle.
📏 Example: 32 inches
Common Mistakes to Avoid When Taking Garment Measurements
Even experienced tailors sometimes make small measurement errors that result in garments that do not fit perfectly. As a professional or aspiring tailor, you must avoid these common mistakes to ensure customer satisfaction and maintain your reputation.
- Pulling the Tape Too Tight or Too Loose
Always maintain gentle tension when using the measuring tape. If it’s too tight, the final garment will be uncomfortable; if it’s too loose, the clothing will appear baggy and ill-fitted. Correct tension ensures precision and better fitting.
- Measuring Over Heavy Clothes Instead of Light Ones
When taking body measurements, always measure over thin clothing or directly on the body. Measuring over thick clothes like sweaters or jackets adds extra inches and can cause major fitting issues.
- Keeping the Measuring Tape Slanted Instead of Straight
Ensure that your measuring tape is level and straight around the body. A slanted tape gives inaccurate readings, especially for chest, waist, and hip measurements.
- Forgetting to Record Measurements Immediately
Even the best tailors can forget exact numbers if they are not written down instantly. Always keep a notepad or digital device ready to note down each measurement as soon as you take it.
- Not Asking the Customer About Their Fit Preference
Every customer has different preferences — some prefer a loose fit for comfort, while others like a slim, body-hugging design. Always confirm the desired fit before cutting the fabric to avoid dissatisfaction later.
By avoiding these common tailoring measurement mistakes, you will create perfectly fitting garments every time, leading to happy customers and more repeat business
Pro Tips from CBVSD – Perfect Measurement for Perfect Fitting
At CBVSD (Central Board of Vocational Skill Development), we believe that accurate measurement is the foundation of high-quality tailoring. Whether you are making a simple kurta or a designer gown, the right measurement ensures the perfect fit, customer satisfaction, and repeat business. Here are some expert tips from CBVSD to help you become a professional in garment measurement:
- Always Measure Twice for Accuracy
One quick measurement can lead to mistakes. Professional tailors at CBVSD recommend measuring twice to confirm the result. This extra step helps avoid costly errors in cutting fabric.
- Ensure the Person Stands Straight and Relaxed
A good posture is essential while taking measurements. Ask the client to stand upright but relaxed so that the measurements reflect their natural body shape. This prevents the garment from being too tight or too loose.
- Use Inches for Most Indian Tailoring Work
In India, inches are more commonly used in tailoring than centimeters. This makes it easier to communicate measurements with customers and other tailors.
- Keep a Ready Measurement Chart for Common Garment Types
Whether it’s for men’s shirts, women’s salwar suits, or children’s frocks — having a ready chart helps you work faster and maintain consistency.
- Allow Extra Growth Margin for Children’s Clothes
Children grow quickly, so always add a little extra fabric allowance in your measurements. This makes the clothes wearable for a longer period.
- Understand Fabric Behavior – Shrinkage and Stretch
Some fabrics shrink after washing, while others stretch. Learn about different fabric types and adjust measurements accordingly to ensure the final fit remains perfect.
By following these CBVSD professional tips, you can improve your accuracy, earn customer trust, and grow your tailoring career.
How CBVSD Helps You Master the Skill of Accurate Measurement
At CBVSD (Central Board of Vocational Skill Development), we believe that accurate measurement is the foundation of professional tailoring. That’s why our Tailoring Training Program is designed to give students not just theoretical knowledge, but real, hands-on skills they can use in the fashion and garment industry.
Here’s how we help you become a measurement expert:
- Practical Training with Live Models – You will practice taking measurements on real people of different body types so that you can confidently handle any customer in the future.
- Guidance from Industry Experts – Our experienced trainers have worked for years in tailoring and fashion, ensuring you learn the tricks and techniques used by professionals.
- Special Lessons on Posture & Fabric Adjustment – We teach you how to adjust for standing posture, sitting posture, and how different fabrics can affect measurements.
- Use of Industry-Standard Measurement Charts – Learn to work with measurement charts used by top tailoring businesses for accuracy and consistency.
- Training with Modern Sewing Equipment – We provide you with the latest sewing machines and tools to match industry needs.
- Business & Employment Guidance – Whether you want to start your own tailoring shop or work in a reputed fashion house, CBVSD prepares you for success.
By the end of this course, you will be able to take accurate measurements for any body shape quickly, confidently, and professionally. This skill is what keeps customers satisfied, helps you get repeat orders, and builds your reputation as a skilled tailor.
Conclusion
A tailor’s reputation depends on fit and comfort. Learning the correct way to take clothing measurements is the foundation of a successful tailoring career.
With CBVSD’s expert training, you can become a trusted tailor in your community or even start your own business.
📌 Start your tailoring journey today with CBVSD and master the art of perfect measurement.
Frequently Asked Questions (FAQs)
1. Why is accurate measurement important in tailoring?
Accurate measurement is the foundation of perfect tailoring. If the measurements are wrong, the final garment will either be too loose or too tight. A correct measurement ensures proper fitting, comfort, and professional finishing, which increases customer satisfaction.
2. What tools are needed for taking clothing measurements?
To take correct measurements, a tailor usually needs:
- Measuring tape
- Notebook and pen
- Tailor’s chalk or marker
- Mirror (optional for fittings)
- Assistant (optional but helpful for body measurements)
3. How do you measure chest size correctly?
Wrap the measuring tape around the fullest part of the chest, ensuring it is straight and not twisted. Keep the tape slightly loose for comfort but not too loose to avoid inaccurate readings.
4. How do you measure waist size?
Locate the natural waistline (slightly above the belly button) and wrap the measuring tape around it. Keep the tape snug but not tight, and ensure the person is standing straight without holding their breath.
5. How do you measure hip size?
Wrap the measuring tape around the fullest part of the hips and buttocks. Keep the tape parallel to the ground for the most accurate measurement.
6. How do you measure shoulder width?
Measure from the edge of one shoulder bone to the other, across the back. This measurement is important for shirts, jackets, and blouses.
7. How do you measure sleeve length?
Start from the edge of the shoulder and measure down the arm to the wrist bone. If the client prefers longer sleeves, add an extra inch.
8. How do you measure inseam for trousers?
Measure from the crotch area down to the desired pant length (usually to the ankle or shoe top). This ensures trousers are neither too short nor too long.
9. What mistakes should tailors avoid when taking measurements?
Common mistakes include:
- Pulling the tape too tight or leaving it too loose
- Measuring over thick clothing
- Not noting down measurements immediately
- Ignoring posture while measuring
10. Can body shape affect measurement techniques?
Yes. Different body shapes (slim, average, plus-size) may require slight adjustments in how the tape is placed. A professional tailor always considers posture, body curves, and comfort.
11. How often should measurements be updated for regular customers?
If the customer’s body weight changes or more than 6 months have passed since the last measurement, it’s best to take new measurements before starting a new garment.
12. What is the difference between body measurements and garment measurements?
- Body measurements: Taken directly from the person’s body.
- Garment measurements: Taken from an existing piece of clothing to replicate size and style.
13. Can customers take their own measurements at home?
Yes, but professional assistance is recommended. Self-measuring can lead to mistakes due to wrong tape placement or incorrect reading.
14. How does CBVSD help in teaching measurement techniques?
CBVSD’s tailoring training courses provide step-by-step guidance on taking accurate measurements for all types of garments. Students learn both theoretical and practical methods to ensure professional results.
15. Why is accurate body measurement important in tailoring?
A: Accurate body measurements ensure the garment fits perfectly, enhancing comfort and appearance. In tailoring, even a half-inch difference can affect the final result. CBVSD-trained tailors are experts in precision measurements for professional results.
16. What are the basic tools needed for taking measurements?
A: The essential tools include a soft measuring tape, a measurement chart or notebook, a pen or marker, and sometimes a mannequin for reference. CBVSD tailoring courses train students to use these tools effectively.
17. Can I take my own measurements without a tailor?
A: You can, but self-measurement often leads to errors. For best results, it’s better to ask a professional tailor or a friend trained by an institute like CBVSD.
18. How do tailors measure chest and bust size?
A: The measuring tape is placed around the fullest part of the chest/bust while ensuring it is parallel to the ground. The measurement should be snug but not tight.
19. How do you measure waist size correctly?
A: The waist is measured around the narrowest part of the torso, usually above the belly button. For dresses or skirts, tailors may also take a “low waist” measurement.
20. What is the correct way to measure hip size?
A: The hip measurement is taken around the widest part of the hips and buttocks, ensuring the tape is straight all around.
21. How do tailors take sleeve measurements?
A: The sleeve is measured from the shoulder seam down to the wrist bone. For full-sleeve outfits, an elbow bend measurement may also be included.
22. How do you measure shoulder width?
A: The tape is placed from one shoulder bone to the other across the back, keeping it straight. This is crucial for shirts, blouses, and jackets.
23. What happens if the measurements are wrong?
A: Wrong measurements can lead to loose or tight clothing, wasted fabric, and unhappy customers. That’s why CBVSD emphasizes accuracy in all tailoring training sessions.
24. How often should I re-take measurements?
A: Measurements should be re-taken if there is any noticeable change in weight or body shape. For growing children, updates should be done every 3–6 months.
25. Can I learn professional measurement techniques?
A: Yes, institutes like CBVSD offer professional tailoring courses where students learn step-by-step measurement techniques along with garment construction.
26. How long does it take to learn accurate measuring skills?
A: With proper training, most students can master the basics in 2–4 weeks. CBVSD provides hands-on practice to build confidence.